
Features and characteristics
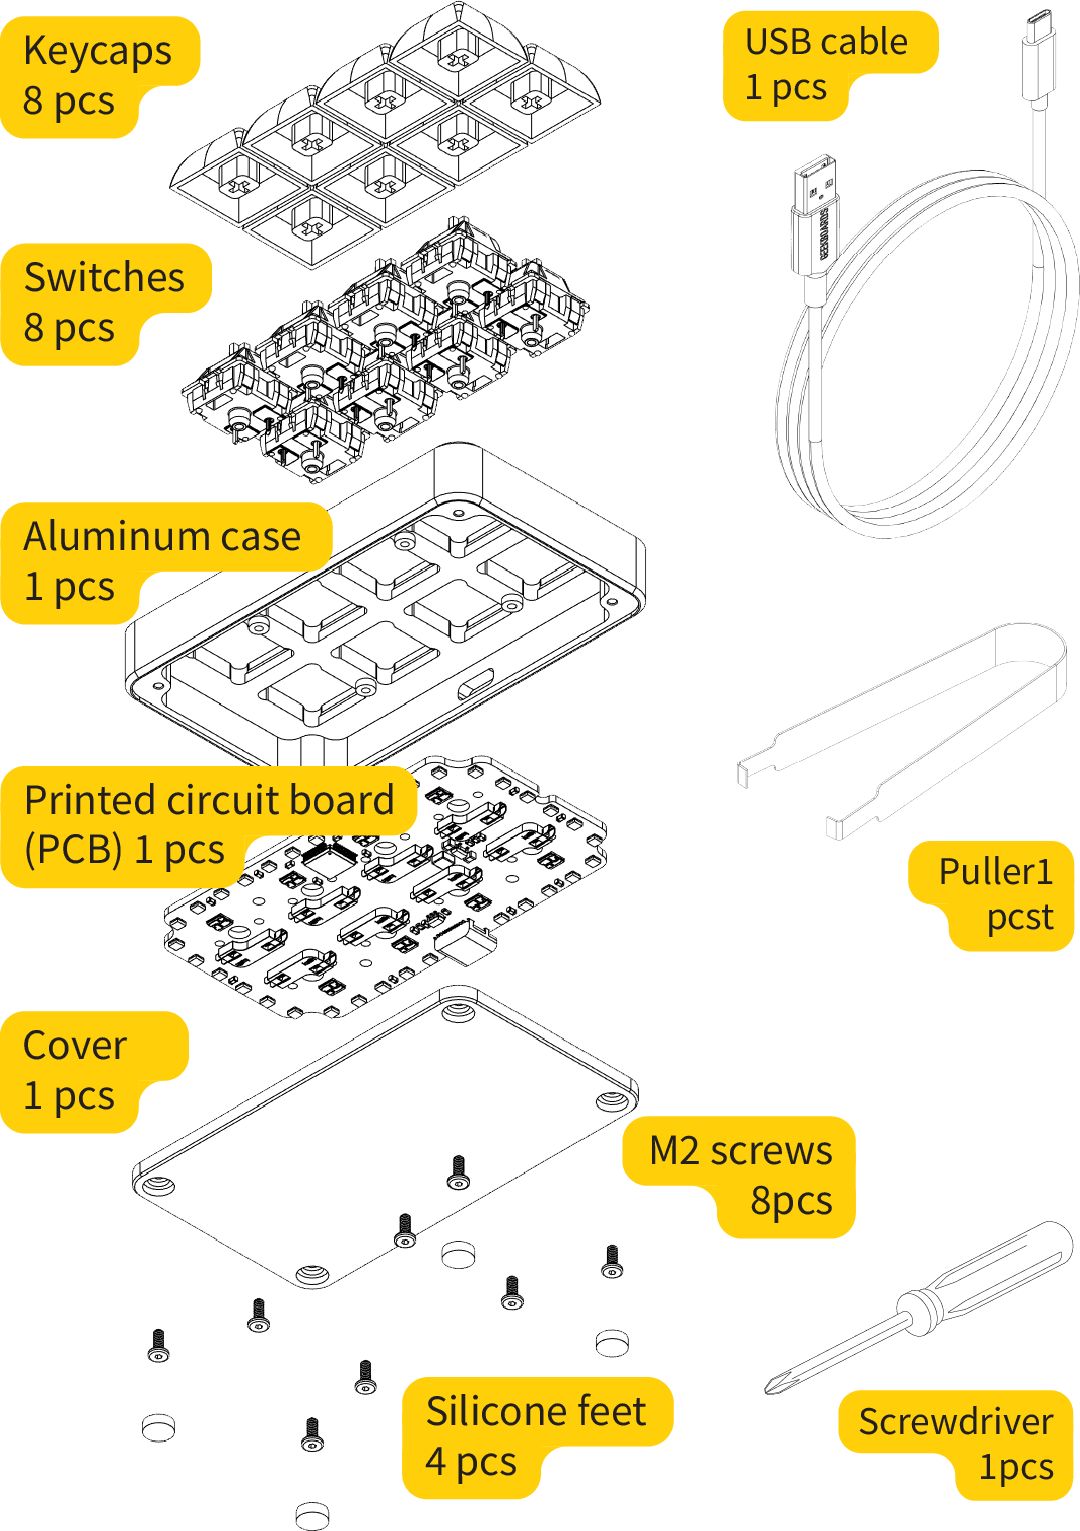
 8 keys with Hot Swap
 4 layers / 16 macros
 Win, MacOS, Linux friendly
 Keymap changer through VIA configurator
 Open-source QMK firmware
 RGB Backlit keys + effects
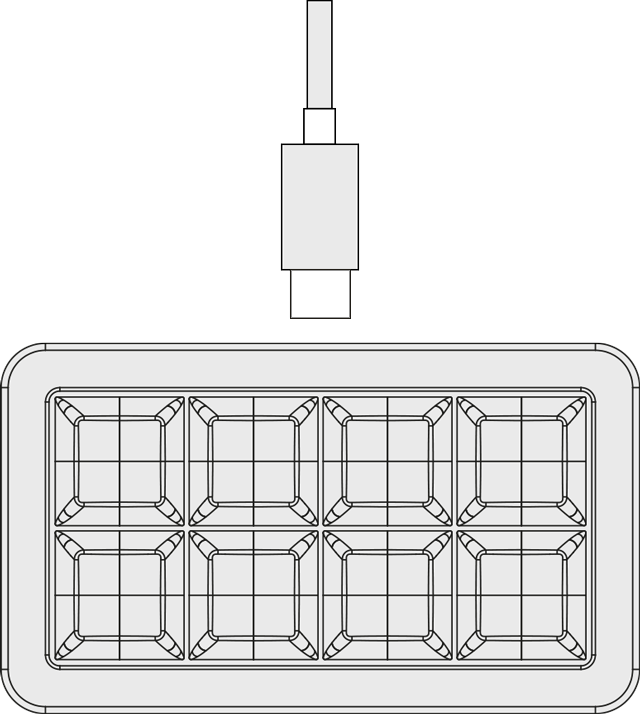
 USB TYPE-C
 Aluminum case
Macropad kit set
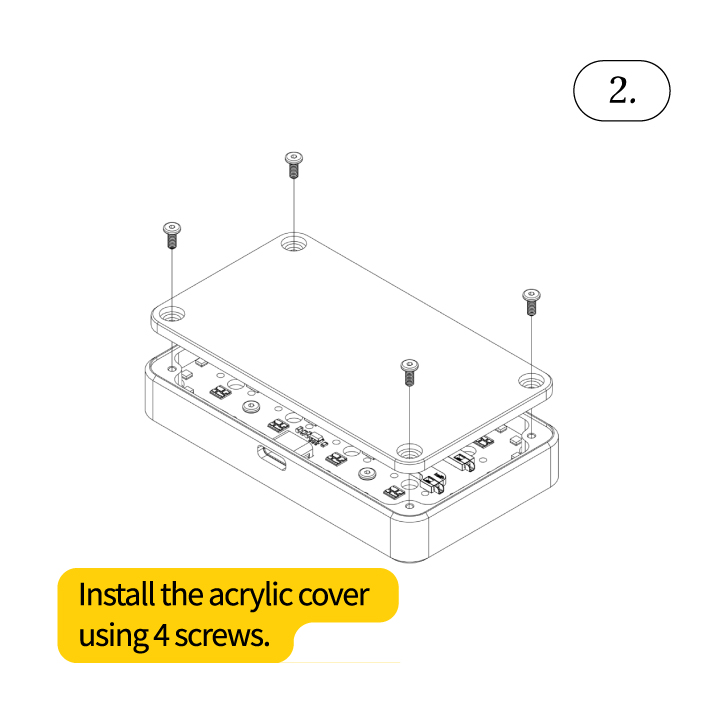
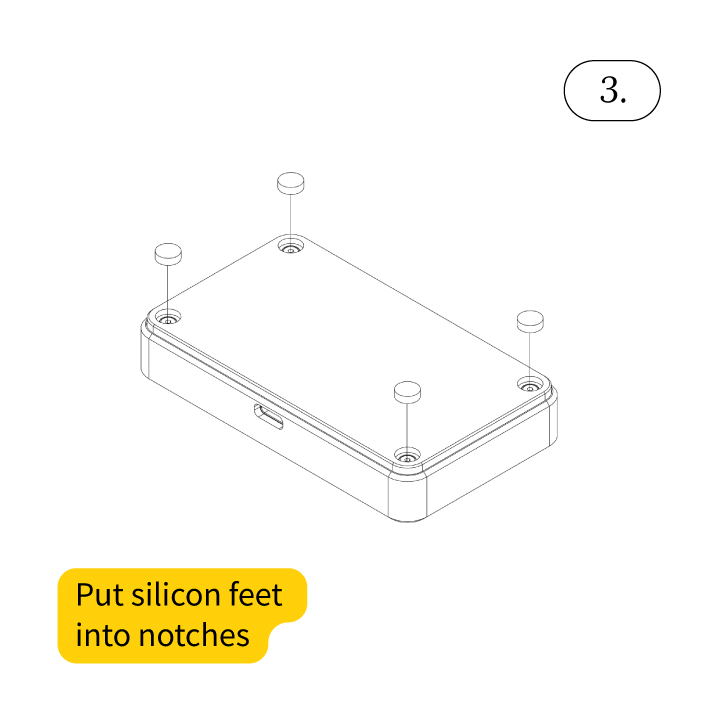
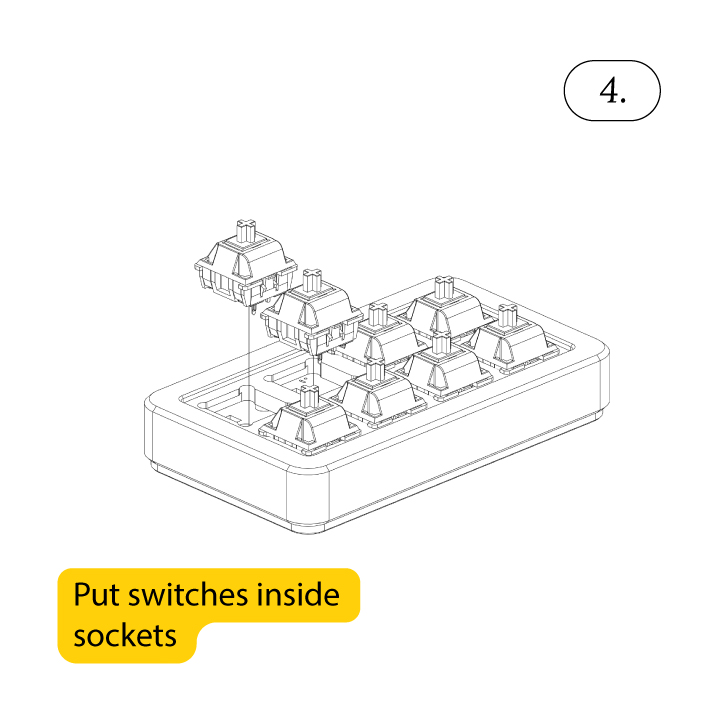
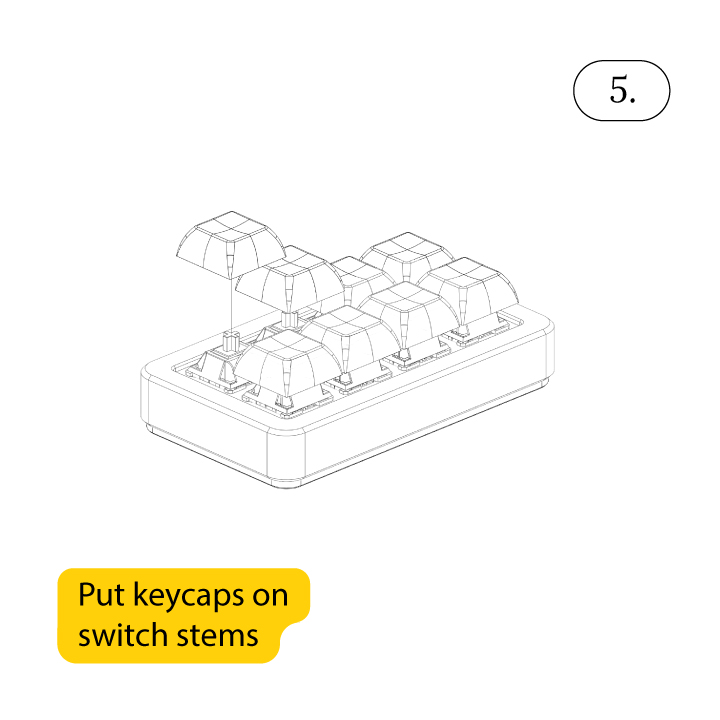
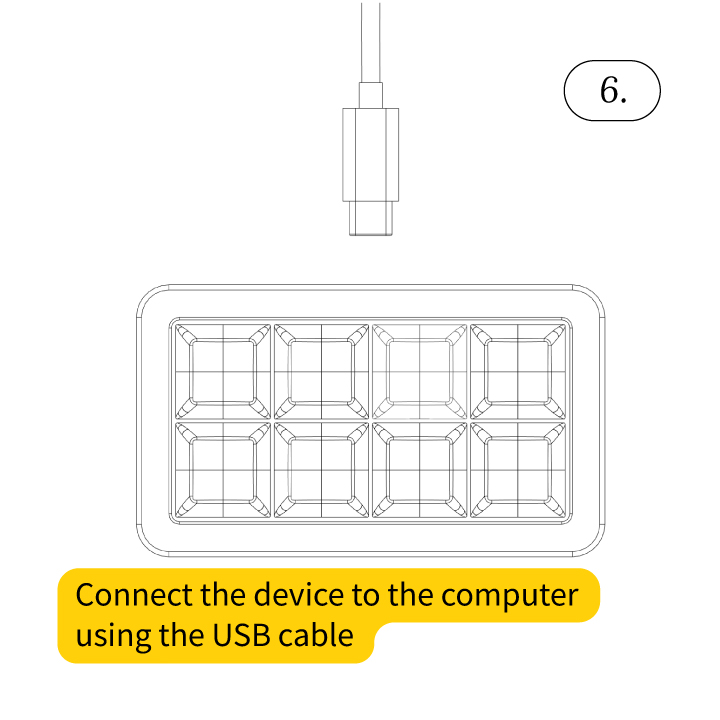
Keyboard assembly and preparing for use

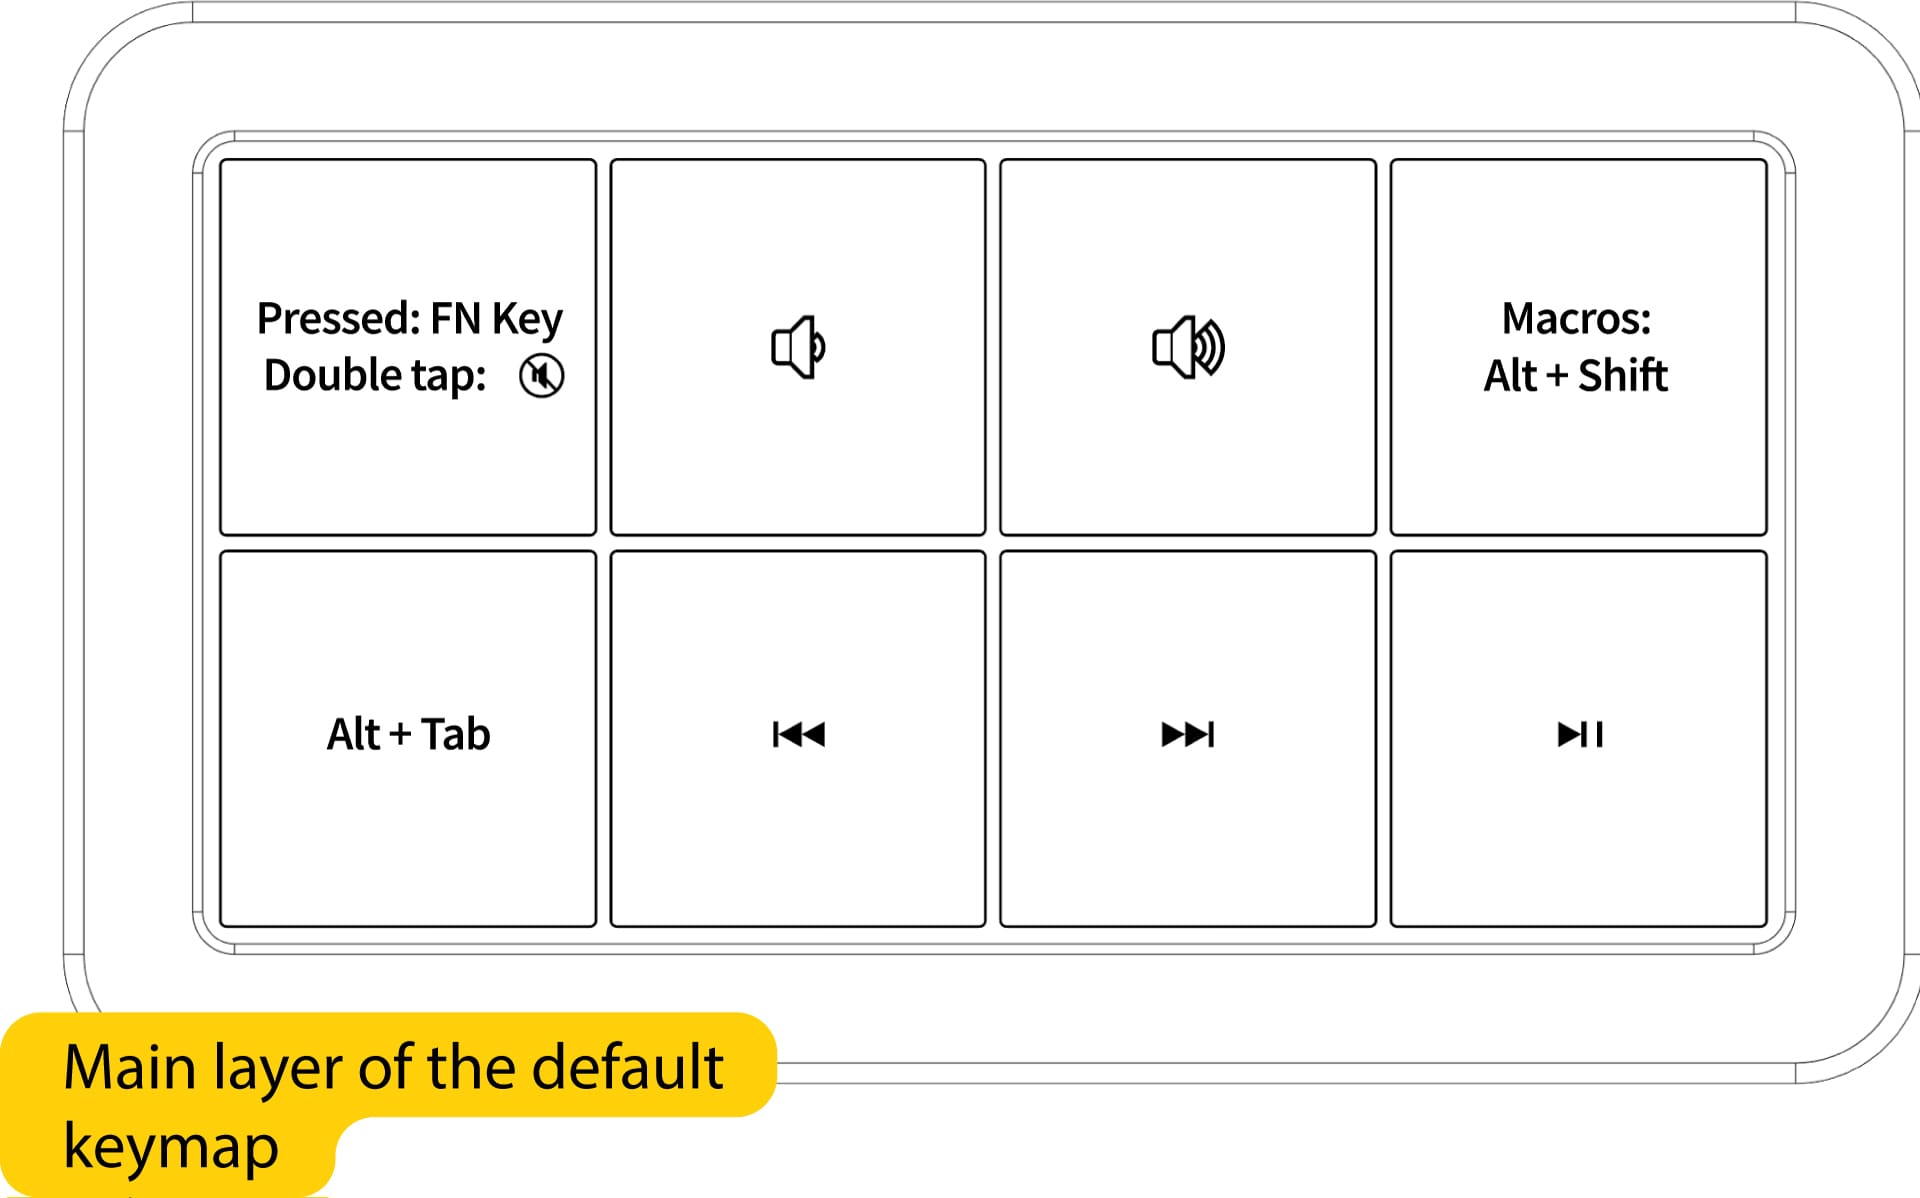
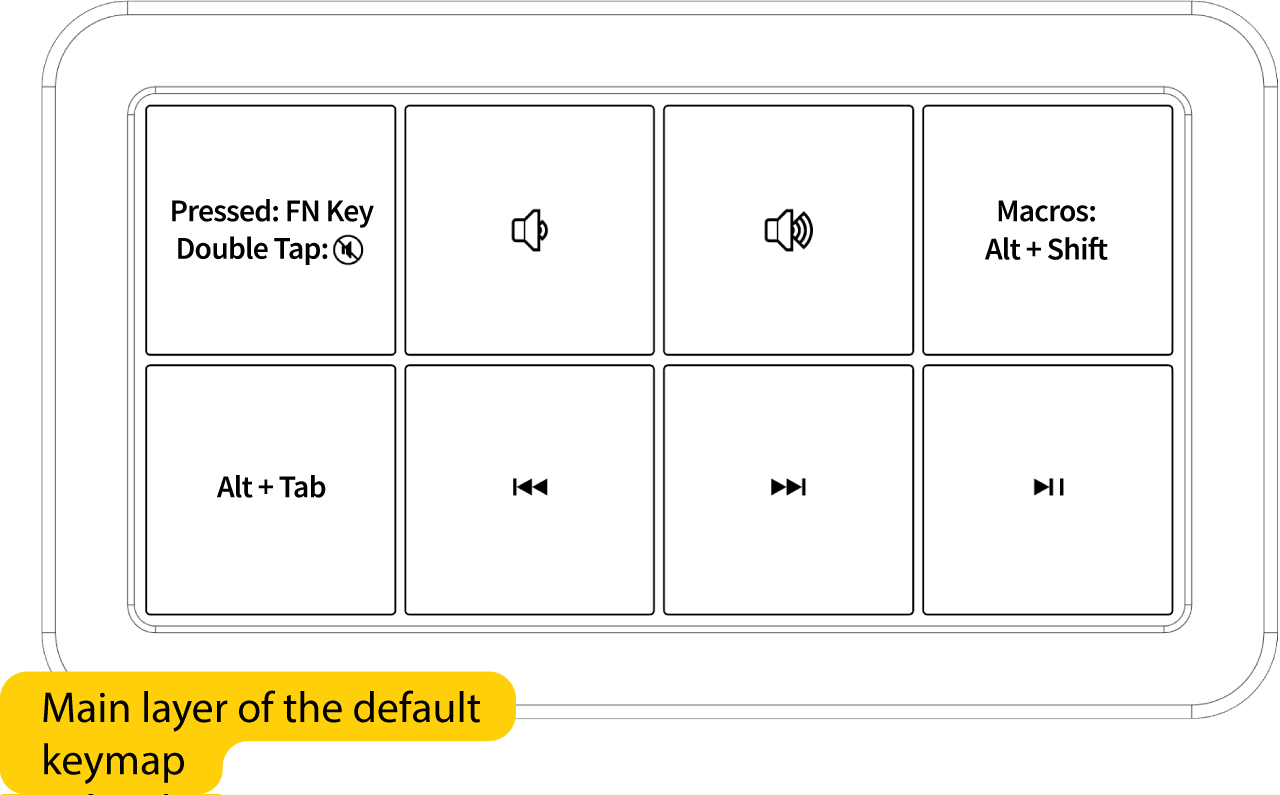
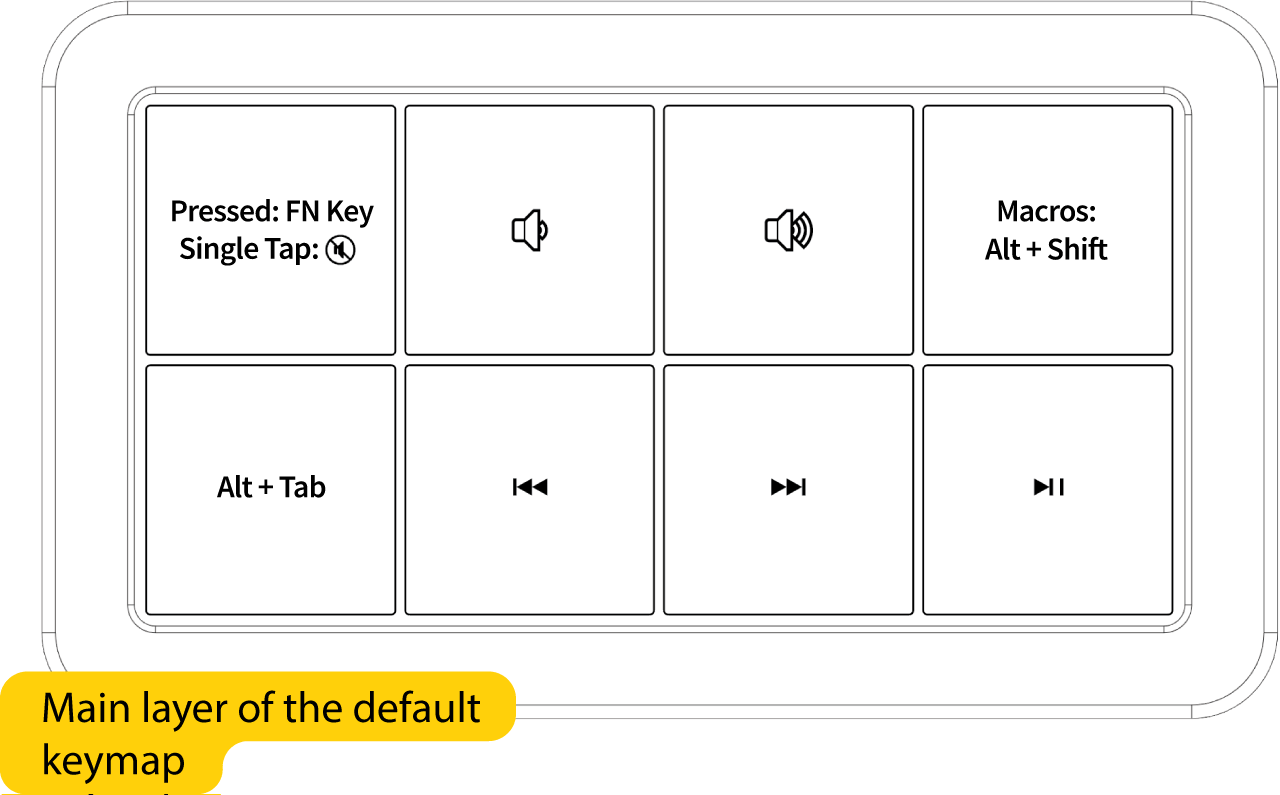
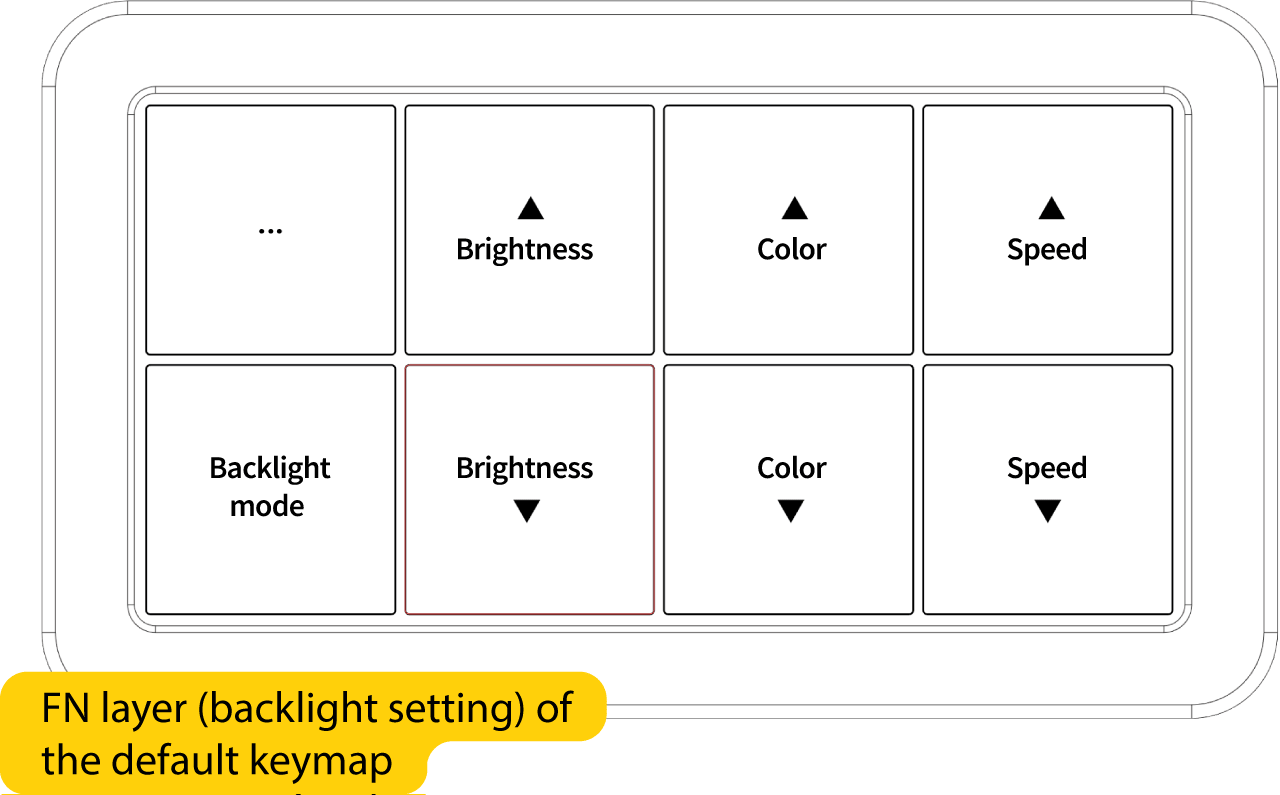
Default keymap
v1 (if you bought before December 20, 2021)

v1.2 (if you bought after December 20, 2021)
Configurator
Download and install the app for the VIA configuration:
This app allows you to assign different commands to each Macropad switch, manage layers and macros, customize backlight mode, color and brightness, save configurations to a file and restore them from this file.
Once the application is launched and Macropad is connected to the computer, the settings dialog opens.
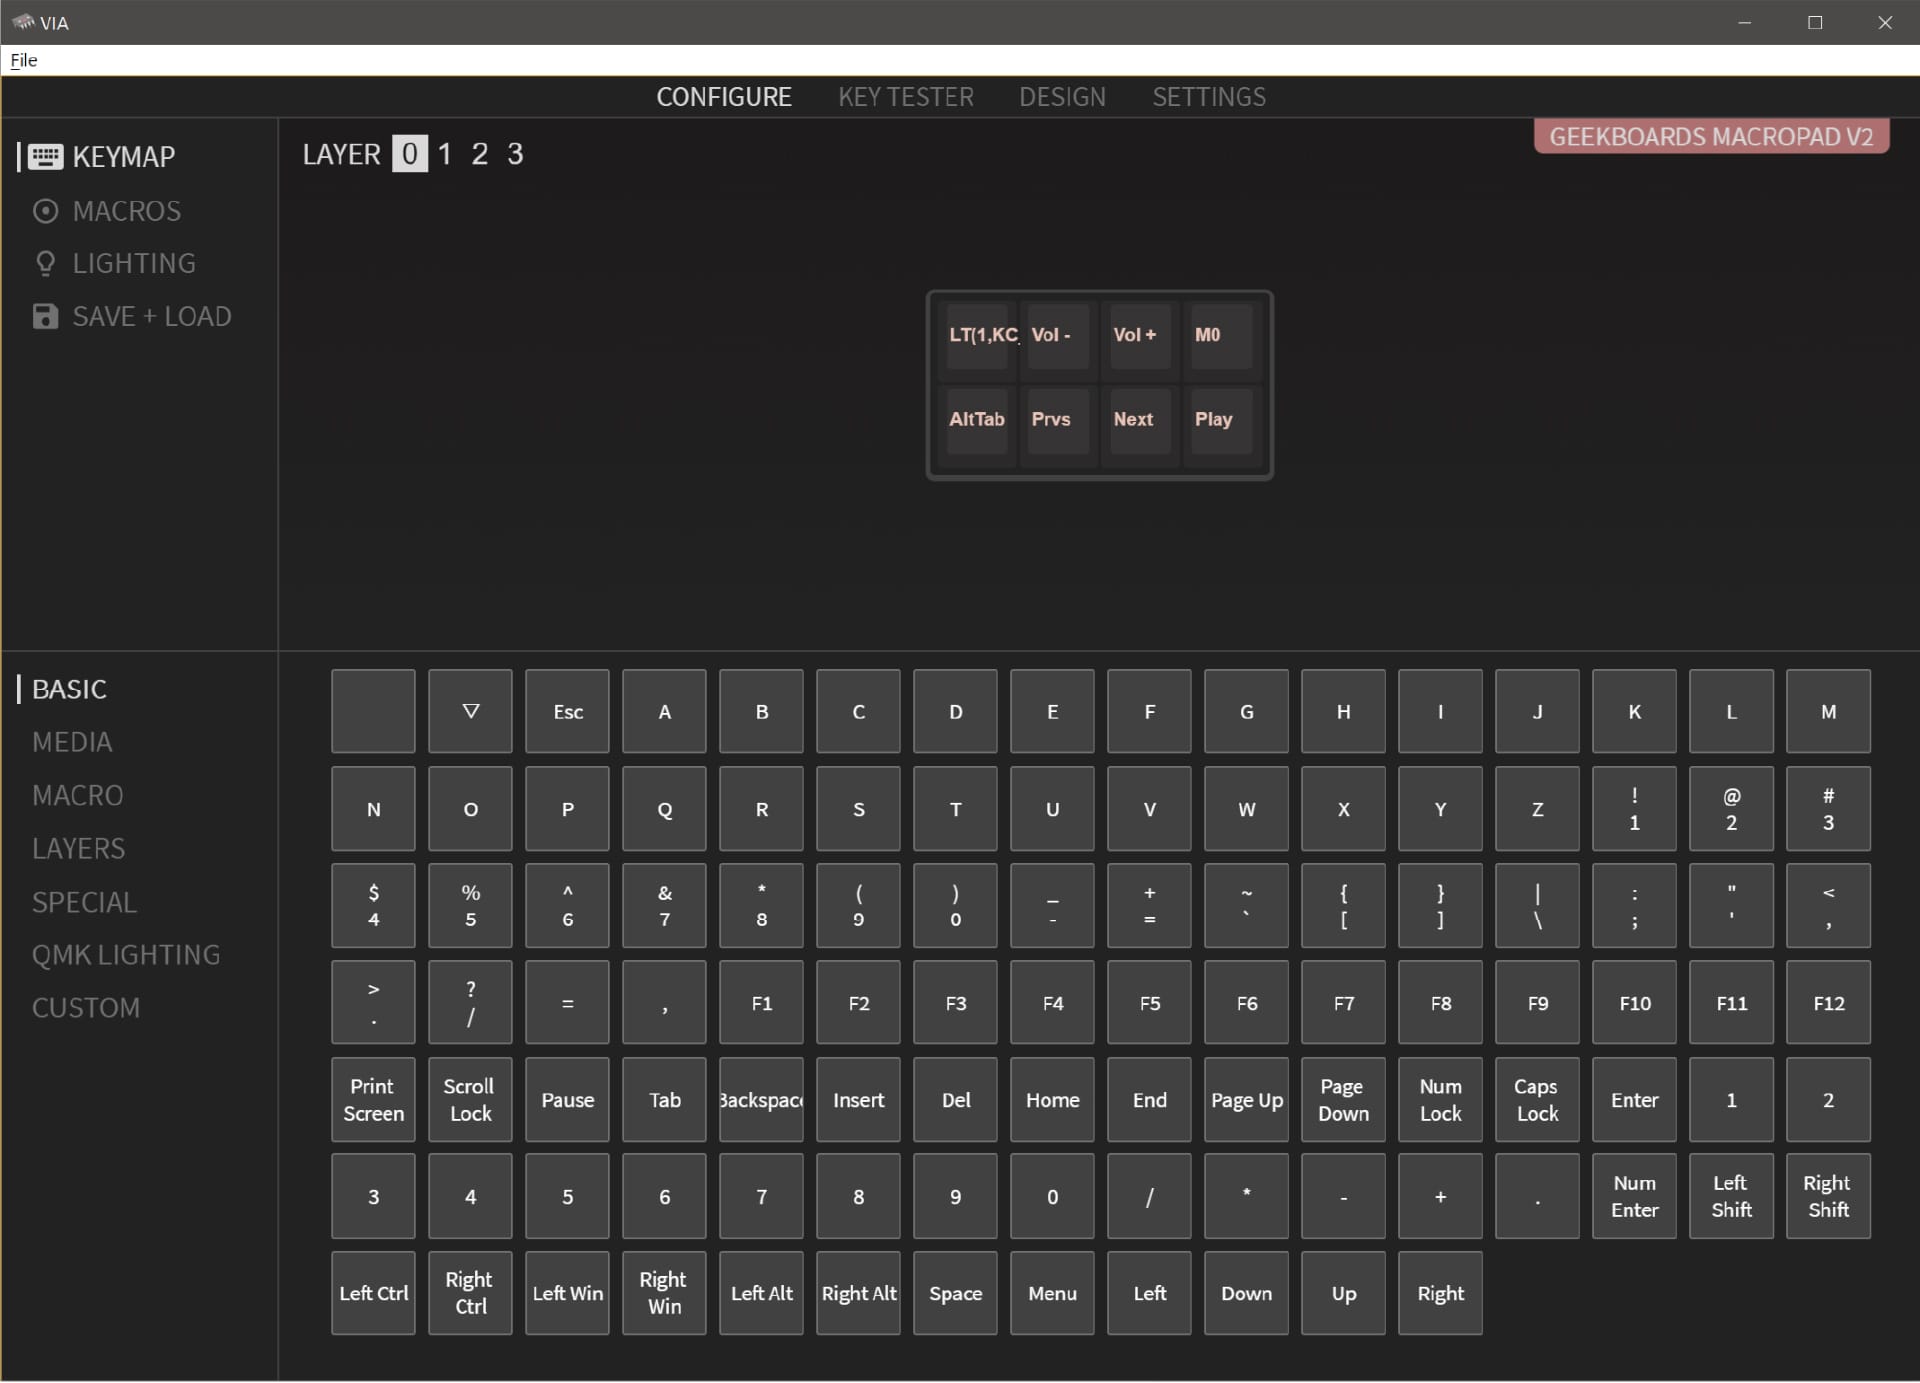
Example
Macropad² tuning for streamersFirmware update Win + Mac
- Download firmware at the link
- Download and run the application QMK Toolbox
- Choose the downloaded firmware in the Local file section
- Disconnect Macropad from the computer
- While holding the top left button, connect the Macropad to the computer. Continue to hold the button for 3 more seconds, then release. Macropad backlight should not be on. If the backlight is on, repeat steps 4 and 5.
- Make sure there is the following text box in QMK Toolbox section:
*** STM32 device connected: STMicroelectronics STM32 BOOTLOADER - Press
FLASHand wait for the end of the firmware update.
Firmware update Linux
- Download Docker CE
- Download Git
- Open a terminal and do the following:
git clone --recurse-submodules https://github.com/geekboards/qmk_firmware.gitcd qmk_firmware/sudo util/docker_build.sh geekboards/Macropad_v2:via:flash
IT DOWNLOADS THE LAST VERSION OF QMK, SETS UP ENVIRONMENT, COMPILES AND FLASHES UP-TO-DATE FIRMWARE VERSION - Disconnect Macropad from the computer
- While holding the top left button, connect the Macropad to the computer. Continue to hold the button for 3 more seconds, then release. Macropad backlight should not be on. If the backlight is on, repeat steps 4 and 5
- Wait for the end of firmware update
Macropad care
To clean up the Macropad:
- Disconnect the Macropad from the power supply and take out the USB cable
- Remove the keycaps with a puller, straight up, so as not to damage the Macropad
- Remove switches with puller
- Flip the Macropad and lightly pat its bottom and shake out all the dirt
- Wipe off any dirt and dust from the keycaps with a slightly damp, clean microfiber cloth. Then wipe dry
- Dust and dirt from the case and board can be removed with a microfiber cloth moistened with an alcohol-containing liquid
- Make sure the case and keycaps are completely dry before assembly
- Treat the Macropad cable with care. Do not bend the cable, do not pull on it, do not disconnect or connect the cable unnecessarily, in order to avoid rapid wear off of the USB port
Factory reset
- Disconnect the Macropad from the computer
- While holding the top left button, connect the Macropad to the computer. Continue to hold the button for 3 more seconds, then release. Macropad backlight should not be on
- Turn off the Macropad and then turn it back on, don’t hold any buttons
- Macropod is reset to its factory settings